FEASTFUL JOURNEY
  • Home
  • Contact Us
  • Privacy & Policy
  • About Us
  • Terms And Conditions
  • DMCA

Fry Jacks Recipe: A Delightful Belizean Breakfast Treat

Fry jacks are a beloved breakfast staple in Belizean cuisine, cherished for their golden, crispy texture and versatility. These puffy, fried dough triangles are similar to beignets or sopapillas but with a unique charm that makes them stand out. Perfect as a savory or sweet dish, fry jacks pair wonderfully with eggs, beans, and cheese, or drizzled with honey or dusted with powdered sugar for a sweet treat.

In this article, you’ll learn how to make authentic Belizean fry jacks step by step. Whether you’re craving a taste of the Caribbean or looking for a quick, satisfying breakfast, this fry jacks recipe will hit the spot.


Why Fry Jacks Are a Must-Try

  1. Simple Ingredients: Fry jacks are made with pantry staples, making them an easy recipe to whip up anytime.
  2. Quick to Prepare: The dough comes together in minutes and cooks quickly in hot oil.
  3. Customizable: Enjoy them savory or sweet—fry jacks can be adapted to suit your cravings.
  4. Cultural Delight: A quintessential part of Belizean cuisine, fry jacks bring a taste of the Caribbean to your kitchen.

Ingredients

To make fry jacks, you’ll need:

  • 2 cups all-purpose flour
  • 1 teaspoon baking powder
  • ½ teaspoon salt
  • 1 teaspoon sugar (optional)
  • 1 teaspoon vegetable oil or melted butter
  • ½ cup warm water
  • Vegetable oil for frying

Optional toppings:

  • Honey, powdered sugar, or cinnamon for a sweet version
  • Refried beans, cheese, or eggs for a savory version

Step-by-Step Instructions

Step 1: Prepare the Dough

  1. Mix the Dry Ingredients: In a large mixing bowl, combine the flour, baking powder, salt, and sugar (if using). Stir until evenly distributed.
  2. Add the Fat: Add the vegetable oil or melted butter to the dry ingredients. Use your fingers or a fork to incorporate it into the flour mixture until it resembles coarse crumbs.
  3. Add Water Gradually: Slowly pour in the warm water, mixing with a spoon or your hands until the dough comes together. It should be soft but not sticky.

Step 2: Knead the Dough

  1. Knead on a Floured Surface: Turn the dough onto a lightly floured surface and knead for 3-5 minutes until it becomes smooth and elastic.
  2. Rest the Dough: Cover the dough with a clean kitchen towel or plastic wrap and let it rest for 15-30 minutes. This allows the gluten to relax, making it easier to roll out.

Step 3: Shape the Fry Jacks

  1. Roll Out the Dough: Divide the dough into 4 equal portions. Roll each portion into a ball and flatten it with a rolling pin into a thin circle, about ¼ inch thick.
  2. Cut into Triangles: Use a knife or pizza cutter to slice each circle into 4-6 triangular pieces.

Step 4: Fry the Dough

  1. Heat the Oil: In a deep skillet or pot, heat about 2 inches of vegetable oil over medium heat until it reaches 350°F (175°C).
  2. Test the Oil: Drop a small piece of dough into the oil. If it sizzles and rises to the surface, the oil is ready.
  3. Fry the Triangles: Carefully place a few triangles of dough into the hot oil, avoiding overcrowding. Fry for about 1-2 minutes on each side until they puff up and turn golden brown.
  4. Drain Excess Oil: Remove the fry jacks with a slotted spoon and place them on a plate lined with paper towels to absorb excess oil.

Serving Suggestions

Fry jacks are incredibly versatile and can be served in a variety of ways:

  • Savory: Pair with scrambled eggs, refried beans, or cheese for a hearty breakfast.
  • Sweet: Drizzle with honey, sprinkle with powdered sugar, or serve with a side of jam for a dessert-like treat.
  • Authentic Belizean Style: Serve with fried fish, stewed chicken, or avocado for a traditional Belizean meal.

Tips for Perfect Fry Jacks

  1. Don’t Overwork the Dough: Knead just until smooth—over-kneading can make the dough tough.
  2. Cut Evenly: Uniform pieces ensure even cooking.
  3. Maintain Oil Temperature: If the oil is too hot, the fry jacks will brown too quickly; if it’s too cool, they’ll absorb too much oil.
  4. Serve Fresh: Fry jacks are best enjoyed warm and freshly made.

Variations

  • Coconut Fry Jacks: Substitute some of the water with coconut milk for a subtle tropical flavor.
  • Whole Wheat Fry Jacks: Use whole wheat flour instead of all-purpose flour for a heartier version.
  • Stuffed Fry Jacks: Roll out the dough thinner, place a filling like cheese or beans in the center, fold, and seal the edges before frying.

Storage and Reheating

  1. Refrigeration: Store leftover fry jacks in an airtight container in the refrigerator for up to 2 days.
  2. Reheating: Reheat in a toaster oven or air fryer to restore their crispiness. Avoid microwaving, as it can make them soggy.

Why You Should Try This Recipe

Fry jacks are more than just a breakfast dish—they’re a slice of Belizean culture that’s both comforting and delicious. Their light, airy texture and endless versatility make them a standout addition to any meal. Whether you’re exploring Caribbean cuisine or simply looking for a new breakfast favorite, fry jacks are sure to impress.


Conclusion

This fry jacks recipe is an easy, delightful way to bring the flavors of Belize into your home. With just a few simple ingredients and steps, you can create a dish that’s perfect for breakfast, brunch, or even a snack. Whether served sweet or savory, fry jacks are guaranteed to become a favorite in your kitchen.

So roll up your sleeves and give this fry jacks recipe a try—you won’t be disappointed

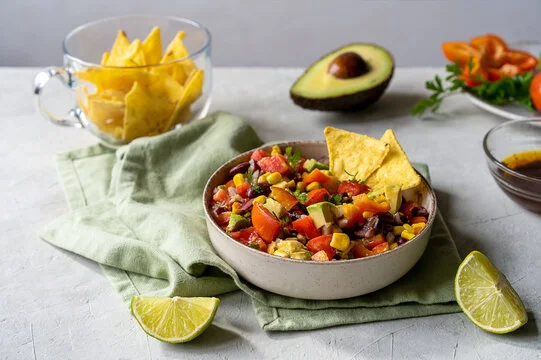
Cowboy Caviar: A Fresh and Flavorful Appetizer Everyone Will Love

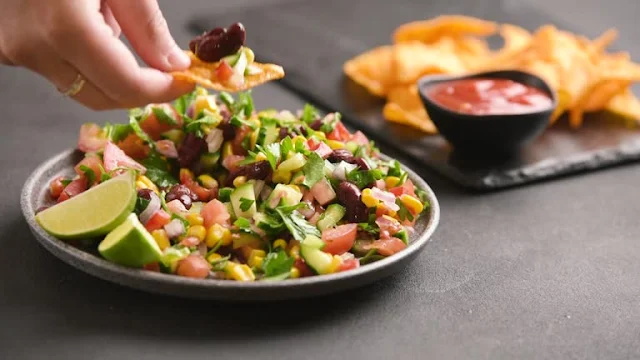
Cowboy caviar, also known as Texas caviar, is a versatile and vibrant dish that has captured the hearts (and taste buds) of people across the country. Whether you’re serving it as a dip with tortilla chips, a side dish for your barbecue, or a topping for tacos, this colorful recipe is always a hit. Packed with fresh vegetables, hearty beans, and a zesty dressing, cowboy caviar is the perfect balance of flavor and texture. This step-by-step guide will show you how to create a crowd-pleasing cowboy caviar that’s both simple to make and unforgettable.

Cowboy Caviar

Why You’ll Love Cowboy Caviar

Cowboy caviar is more than just a recipe—it’s a celebration of fresh, wholesome ingredients. Not only is it delicious, but it’s also:

  • Healthy and Nutritious: Full of fiber, protein, and vitamins from beans and veggies.
  • Customizable: You can adjust the ingredients to suit your preferences or dietary needs.
  • Quick to Prepare: Perfect for last-minute gatherings or meal prepping.
  • Great for Sharing: Its vibrant colors and bold flavors make it a party favorite.

Ingredients

Here’s what you’ll need to make cowboy caviar:

For the Salad:

  • 1 can (15 oz) black beans, rinsed and drained
  • 1 can (15 oz) black-eyed peas, rinsed and drained
  • 1 cup fresh corn kernels (or 1 cup canned or frozen corn, drained and thawed)
  • 1 cup cherry tomatoes, diced
  • 1 red bell pepper, diced
  • 1 green bell pepper, diced
  • ½ red onion, finely chopped
  • 2 avocados, diced
  • ¼ cup fresh cilantro, chopped

For the Dressing:

  • ¼ cup olive oil
  • 2 tbsp red wine vinegar
  • 1 tbsp lime juice (freshly squeezed)
  • 1 tsp honey (or maple syrup for a vegan option)
  • 1 tsp chili powder
  • ½ tsp cumin
  • ½ tsp garlic powder
  • Salt and pepper to taste

Step-by-Step Instructions

Step 1: Prepare the Ingredients

  1. Drain and Rinse the Beans: Open the cans of black beans and black-eyed peas, drain them in a colander, and rinse thoroughly under cold water. This removes excess sodium and ensures a fresh taste.
  2. Dice the Vegetables: Chop the cherry tomatoes, bell peppers, red onion, and avocado into small, bite-sized pieces. Keep the avocado aside to add at the end to prevent browning.
  3. Chop the Cilantro: Finely chop the fresh cilantro leaves for a burst of herbal flavor.

Step 2: Make the Dressing

  1. In a small bowl or jar, combine olive oil, red wine vinegar, lime juice, honey, chili powder, cumin, and garlic powder.
  2. Add salt and pepper to taste.
  3. Whisk or shake the mixture until emulsified. Taste and adjust the seasoning if needed.

Step 3: Combine the Salad

  1. In a large mixing bowl, add the black beans, black-eyed peas, corn, cherry tomatoes, bell peppers, red onion, and cilantro.
  2. Pour the dressing over the mixture. Use a large spoon or spatula to toss everything together until well-coated.

Step 4: Add the Avocado

  1. Just before serving, gently fold in the diced avocado. This ensures it stays fresh and doesn’t turn mushy.

Step 5: Serve and Enjoy

  1. Transfer the cowboy caviar to a serving dish or bowl.
  2. Serve it as a dip with tortilla chips, a side dish for grilled meats, or even as a filling for tacos and wraps.

Tips for Perfect Cowboy Caviar

  1. Use Fresh Ingredients: Fresh vegetables and lime juice elevate the dish’s flavor.
  2. Let It Marinate: For the best taste, let the cowboy caviar sit in the refrigerator for 30 minutes to an hour before serving. This allows the flavors to meld together.
  3. Keep It Colorful: Use a variety of colorful bell peppers and tomatoes to make the dish visually appealing.
  4. Make It Spicy: Add a diced jalapeño or a pinch of cayenne pepper to the dressing for some heat.
  5. Adjust the Sweetness: If you prefer a sweeter dressing, add a bit more honey or maple syrup.

Variations

  1. Mexican-Inspired Cowboy Caviar: Add diced jalapeños, crumbled cotija cheese, and a pinch of smoked paprika.
  2. Mediterranean Twist: Swap cilantro for parsley, add crumbled feta cheese, and use lemon juice instead of lime.
  3. Protein Boost: Toss in grilled chicken, shrimp, or tofu to turn it into a complete meal.
  4. Tropical Flair: Add diced mango or pineapple for a sweet and tangy contrast.

How to Store Cowboy Caviar

  1. Refrigeration: Store cowboy caviar in an airtight container in the refrigerator for up to 3 days.
  2. Avocado Tip: If you plan to store leftovers, add the avocado just before serving to prevent browning.
  3. Refreshing the Salad: If the mixture seems dry after refrigeration, add a splash of lime juice or olive oil to revive it.

Why This Recipe Stands Out

  • Balanced Flavors: The combination of sweet corn, tangy lime, savory beans, and creamy avocado creates a harmonious flavor profile.
  • Nutritional Powerhouse: Packed with fiber, protein, healthy fats, and vitamins, cowboy caviar is as nourishing as it is delicious.
  • Easy to Make: With minimal prep time and no cooking required, it’s a breeze to whip up.
  • Perfect for Any Occasion: From casual family dinners to festive gatherings, this dish is always a crowd-pleaser.

Conclusion

Cowboy caviar is more than just a salad or dip—it’s a versatile dish that embodies the best of fresh, wholesome ingredients. With its vibrant colors, bold flavors, and endless customizations, it’s a recipe that you’ll want to make again and again. Whether you’re a seasoned cook or a kitchen novice, this step-by-step guide ensures your cowboy caviar turns out perfectly every time.

So grab your favorite tortilla chips and dive into the zesty goodness of cowboy caviar. It’s a recipe that will have everyone asking for seconds—and for the recipe!

Cupcakes are a delightful treat for any occasion, and the best part? You don’t need eggs, butter, or milk to make them moist, fluffy, and absolutely delicious. Whether you're baking for a party, celebrating a birthday, or just satisfying a sweet tooth, vegan cupcakes are a fantastic choice. This step-by-step guide will walk you through creating the perfect batch of vegan cupcakes that even non-vegans will love.


Why Vegan Cupcakes?

Vegan cupcakes are not only dairy-free and egg-free but also versatile, inclusive, and often healthier. By using plant-based ingredients, you can create desserts that align with ethical and environmental values without compromising on flavor or texture. Plus, with so many plant-based options available today, baking vegan has never been easier!


Ingredients

This recipe yields 12 standard-sized cupcakes.

For the Cupcakes:

  • 1 ½ cup's all-purpose flour
  • 1 cup granulated sugar
  • 1 teaspoon baking soda
  • ½ teaspoon salt
  • 1 cup plant-based milk (like almond, soy, or oat milk)
  • ⅓ cup vegetable oil (or melted coconut oil)
  • 1 teaspoon apple cider vinegar
  • 1 teaspoon vanilla extract
  • Optional: 2 teaspoon cocoa powder for chocolate cupcakes.

For the Frosting:

  • ½ cup vegan butter (softened)
  • 2 ½ cups powdered sugar
  • 2 teaspoon plant-based milk
  • 1 teaspoon vanilla extract
  • Optional: Food coloring, sprinkles, or other decorations.

Step-by-Step Instructions

Step 1: Prepare Your Equipment

  1. Preheat the Oven: Set your oven to 350°F (175°C) and line a 12-cup muffin tin with cupcake liners.
  2. Gather Ingredients: Ensure all ingredients are at room temperature for even mixing.

Step 2: Mix the Dry Ingredients

  1. In a large mixing bowl, combine the all-purpose flour, granulated sugar, baking soda, and salt.
  2. Whisk the dry ingredients together to ensure they’re evenly distributed.

Step 3: Mix the Wet Ingredients

  1. In a separate bowl or measuring cup, combine the plant-based milk, vegetable oil, apple cider vinegar, and vanilla extract.
  2. Stir well until the mixture is smooth and emulsified.

Step 4: Combine Wet and Dry Ingredients

  1. Pour the wet ingredients into the bowl of dry ingredients.
  2. Gently mix with a whisk or spatula until just combined. Avoid overmixing, as this can make the cupcakes dense. The batter should be smooth but slightly thick.

Step 5: Fill the Cupcake Liners

  1. Divide the batter evenly among the cupcake liners, filling each about ¾ full.
  2. Use a spoon or an ice cream scoop for consistent portions.

Step 6: Bake the Cupcakes

  1. Place the muffin tin in the preheated oven.
  2. Bake for 18-20 minutes, or until a toothpick inserted into the center of a cupcake comes out clean.
  3. Remove the cupcakes from the oven and allow them to cool in the pan for 5 minutes before transferring them to a wire rack to cool completely.

Making the Frosting

Step 7: Cream the Vegan Butter

  1. In a large bowl, beat the softened vegan butter using a hand mixer or stand mixer until it’s smooth and creamy.

Step 8: Add the Powdered Sugar

  1. Gradually add the powdered sugar, about ½ cup at a time, beating well after each addition.
  2. If the mixture becomes too thick, add 1 tablespoon of plant-based milk at a time until the frosting reaches your desired consistency.

Step 9: Add Flavor and Color

  1. Mix in the vanilla extract.
  2. If using food coloring, add a few drops and mix until evenly distributed.

Decorating the Cupcakes

Step 10: Frost the Cupcakes

  1. Once the cupcakes are completely cool, spread or pipe the frosting onto each one.
  2. Use a piping bag with a star or round tip for decorative swirls, or simply spread the frosting with a knife or spatula.

Step 11: Add Decorations

  1. Sprinkle with your favorite toppings, such as vegan sprinkles, shredded coconut, or crushed nuts.
  2. For a sophisticated touch, drizzle with melted dark chocolate or dust with cocoa powder.

Variations

  1. Chocolate Vegan Cupcakes: Add 2 tablespoons of cocoa powder to the dry ingredients for a rich chocolate flavor.
  2. Lemon Vegan Cupcakes: Add 1 teaspoon of lemon zest and substitute lemon juice for the apple cider vinegar. Top with lemon-flavored frosting for a zesty treat.
  3. Pumpkin Spice Vegan Cupcakes: Add ½ teaspoon of cinnamon, ¼ teaspoon of nutmeg, and ¼ teaspoon of ginger to the batter.

Tips for Perfect Vegan Cupcakes

  1. Use Fresh Ingredients: Check the freshness of your baking soda to ensure the cupcakes rise properly.
  2. Don’t Overmix: Overmixing activates the gluten in the flour, leading to denser cupcakes.
  3. Cool Completely Before Frosting: Warm cupcakes can melt the frosting, so patience is key!
  4. Experiment with Frosting Flavors: Try adding almond extract, cocoa powder, or fruit puree to the frosting for unique twists.

Storing Vegan Cupcakes

  1. At Room Temperature: Store unfrosted cupcakes in an airtight container at room temperature for up to 2 days.
  2. Refrigerated: Frosted cupcakes can be stored in the refrigerator for up to 5 days. Bring them to room temperature before serving.
  3. Freezing: Unfrosted cupcakes can be frozen for up to 3 months. Thaw overnight in the refrigerator before decorating.

Why You’ll Love This Recipe

  • Quick and Easy: Perfect for bakers of all skill levels.
  • Customizable: Endless flavor and decoration possibilities.
  • Inclusive: A treat everyone can enjoy, whether vegan or not.

Conclusion

Vegan cupcakes are proof that you don’t need dairy or eggs to create a delicious, moist, and crowd-pleasing dessert. With this step-by-step guide, you can whip up a batch of vegan cupcakes that are as beautiful as they are tasty.

Whether you’re hosting a party, surprising a friend, or indulging in a sweet craving, these cupcakes are sure to impress. So grab your apron and start baking—you’re just a few steps away from enjoying the perfect vegan treat!

Tostones, or twice-fried green plantains, are a beloved dish in many Latin American and Caribbean cuisines. Whether served as a snack, side dish, or appetizer, tostones are loved for their crispy texture and satisfying flavor. With minimal ingredients and a straightforward process, they’re a perfect introduction to cooking with plantains.

This recipe breaks down the steps to prepare tostones, ensuring they turn out golden, crispy, and delicious every time. With a little practice, you’ll be frying up these irresistible treats like a pro!


What Are Tostones?

Tostones are slices of green plantains, fried once, flattened, and then fried again to achieve their signature crispy texture. They’re often served with a sprinkle of salt, accompanied by sauces, or as a base for toppings like shredded meat, cheese, or avocado.

Plantains resemble bananas but are starchier and less sweet, making them an excellent choice for savory dishes. The key to perfect tostones lies in using green (unripe) plantains, which hold their shape and develop a satisfying crunch when fried.


Ingredients

To make tostones, you’ll need the following:

  • 2 large green plantains
  • Vegetable oil for frying (canola, peanut, or sunflower oil works well)
  • Salt to taste
  • Optional: garlic sauce, mojo, or ketchup for dipping

Equipment

  • A heavy-bottomed skillet or frying pan
  • Tongs or a slotted spoon
  • A flat-bottomed object for pressing (such as a glass, plate, or tortilla press)
  • Paper towels for draining

Step-by-Step Instructions

Step 1: Prepare the Plantains

  1. Peel the Plantains:
    • Using a sharp knife, cut off both ends of the plantain.
    • Score the skin lengthwise with the tip of the knife, making shallow cuts along the ridges.
    • Gently pry the skin away from the flesh using your fingers or the edge of the knife. Green plantains can be a bit stubborn to peel, so take your time.
  2. Slice the Plantains:
    • Cut the peeled plantains into 1-inch thick slices. Aim for uniform thickness to ensure even cooking.

Step 2: Heat the Oil

  1. In a skillet or frying pan, pour enough oil to create a layer about 1 inch deep.
  2. Heat the oil over medium heat until it reaches approximately 325°F (165°C). You can test the oil by dipping the edge of a plantain slice into it—if it sizzles gently, it’s ready.

Step 3: First Fry

  1. Carefully place the plantain slices into the hot oil in a single layer. Don’t overcrowd the pan; fry in batches if needed.
  2. Fry the plantains for 2-3 minutes on each side, or until they are golden but not fully crispy.
  3. Use tongs or a slotted spoon to transfer the fried plantains to a plate lined with paper towels.

Step 4: Flatten the Plantains

  1. While the plantains are still warm, use a flat-bottomed object to gently press each slice into a disc about ¼-inch thick. Be careful not to press too hard, as they may stick or break apart.
  2. Arrange the flattened plantains on a plate, ready for their second fry.

Step 5: Second Fry

  1. Increase the heat slightly to bring the oil to about 350°F (175°C).
  2. Return the flattened plantains to the hot oil, frying in batches.
  3. Fry each piece for 1-2 minutes per side, or until golden brown and crispy.
  4. Remove the tostones from the oil and drain on fresh paper towels.

Step 6: Season and Serve

  1. While the tostones are still hot, sprinkle them with salt to taste.
  2. Serve immediately with your favorite dipping sauces or as a side dish.

Tips for Perfect Tostones

  1. Use Green Plantains: The greener the plantains, the better the texture for tostones. Yellow or ripe plantains are sweeter and softer, which won’t yield the same crispiness.
  2. Maintain Oil Temperature: Keep an eye on the oil temperature to ensure the plantains fry evenly. Too hot, and they’ll burn; too cool, and they’ll absorb excess oil.
  3. Flatten Gently: Press the plantains evenly but gently to avoid tearing or sticking.
  4. Serve Fresh: Tostones are best enjoyed fresh out of the fryer while they’re hot and crispy.

Variations

  • Garlic Tostones: Rub the tostones with a garlic clove or drizzle with garlic-infused oil for extra flavor.
  • Cheese-Topped Tostones: Sprinkle freshly grated cheese over the hot tostones for a savory twist.
  • Tostones Nachos: Use tostones as a base for nachos, piling on beans, guacamole, salsa, and cheese.
  • Sweet and Savory: Pair tostones with a drizzle of honey or maple syrup for a unique flavor contrast.

Dipping Sauce Ideas

  • Garlic Mojo: A tangy, garlicky sauce made with olive oil, garlic, lime juice, and herbs.
  • Avocado Dip: Blend ripe avocados with lime juice, cilantro, and a pinch of salt for a creamy accompaniment.
  • Spicy Mayo: Mix mayonnaise with a dash of sriracha or your favorite hot sauce.
  • Classic Ketchup: A simple but satisfying option.

Serving Suggestions

Tostones are incredibly versatile and can be served in various ways:

  • As a Snack: Enjoy them on their own with a pinch of salt and a dipping sauce.
  • As a Side Dish: Pair them with rice and beans, grilled vegetables, or a hearty stew.
  • As a Base: Use tostones as a crispy base for toppings like shredded chicken, pulled pork, or ceviche.

Nutritional Benefits

While tostones are fried, they still offer some nutritional benefits:

  • High in Fiber: Green plantains are a good source of dietary fiber, aiding digestion.
  • Rich in Vitamins: They contain vitamins A and C, as well as potassium and magnesium.
  • Gluten-Free: Tostones are naturally gluten-free, making them an excellent choice for those with dietary restrictions.

Conclusion

Tostones are a delicious and simple way to explore the world of Latin American and Caribbean cuisine. Whether you’re making them as a snack, a side dish, or the star of the meal, their crispy texture and savory flavor are sure to impress.

With this step-by-step guide, you’re well-equipped to make perfect tostones at home. So grab some green plantains, heat up the oil, and get ready to enjoy this irresistible treat!

Vegetarian Black-Eyed Peas Recipe: A Comforting, Hearty Dish

Black-eyed peas are a humble yet versatile ingredient that shines in a variety of dishes. Whether you’re a seasoned cook or a beginner in the kitchen, creating a flavorful vegetarian black-eyed peas dish is simple and rewarding. This legume, rich in nutrients and steeped in tradition, is often associated with good luck and prosperity, especially when served during the New Year.

This vegetarian black-eyed peas recipe is a wholesome and delicious way to enjoy this classic ingredient. With a combination of aromatic vegetables, savory spices, and tender black-eyed peas, this dish is perfect as a standalone meal or a side dish.


Why Black-Eyed Peas?

  • Nutritional Benefits: Black-eyed peas are an excellent source of plant-based protein, fiber, and essential vitamins such as folate and iron.
  • Budget-Friendly: They are affordable and can be easily incorporated into a variety of dishes.
  • Flavorful Versatility: With a mild, nutty flavor, black-eyed peas pair well with a range of spices and ingredients.

Ingredients You’ll Need

For this vegetarian black-eyed peas recipe, you’ll need:

  • 1 cup dried black-eyed peas (or 2 cans, rinsed and drained)
  • 1 medium onion, finely chopped
  • 2 garlic cloves, minced
  • 1 medium carrot, diced
  • 1 celery stalk, diced
  • 1 bell pepper, diced (red or green works well)
  • 2 tablespoons olive oil
  • 4 cups vegetable broth (or water)
  • 1 can (14.5 oz) diced tomatoes
  • 1 teaspoon smoked paprika
  • 1 teaspoon cumin
  • ½ teaspoon thyme
  • 1 bay leaf
  • Salt and black pepper to taste
  • Chopped fresh parsley or cilantro for garnish
  • A dash of hot sauce or red pepper flakes (optional, for heat)

Step-by-Step Instructions

Step 1: Prepare the Black-Eyed Peas

  1. For Dried Black-Eyed Peas:
    • Rinse them thoroughly under cold water.
    • Soak overnight in a large bowl of water, or use the quick-soak method: boil for 2 minutes, then remove from heat and let soak for 1 hour. Drain and rinse before cooking.
  2. For Canned Black-Eyed Peas:
    • Simply rinse and drain them.

Step 2: Sauté the Aromatics

  1. Heat olive oil in a large pot over medium heat.
  2. Add the chopped onion, garlic, carrot, celery, and bell pepper. Sauté for 5-7 minutes until the vegetables are softened and fragrant.

Step 3: Add Spices and Tomatoes

  1. Stir in the smoked paprika, cumin, and thyme. Allow the spices to toast for about 30 seconds to release their flavors.
  2. Add the diced tomatoes, stirring well to combine.

Step 4: Simmer the Black-Eyed Peas

  1. Pour in the vegetable broth (or water) and add the drained black-eyed peas. Toss in the bay leaf.
  2. Stir well, bring the mixture to a boil, then reduce the heat to low. Cover the pot and let it simmer for 30-40 minutes if using dried peas, or 15-20 minutes for canned peas.

Step 5: Check and Adjust

  1. Taste the dish and add salt and black pepper as needed.
  2. If you like a bit of heat, add a dash of hot sauce or sprinkle in some red pepper flakes.

Step 6: Garnish and Serve

  1. Remove the bay leaf before serving.
  2. Garnish with freshly chopped parsley or cilantro for a burst of color and freshness.

Serving Suggestions

Vegetarian black-eyed peas are incredibly versatile. Here are a few ways to enjoy this dish:

  1. Over Rice: Serve it over steamed white or brown rice for a hearty, satisfying meal.
  2. With Cornbread: Pair it with warm, crumbly cornbread for a classic Southern-inspired meal.
  3. As a Side Dish: Serve alongside roasted vegetables or a fresh green salad.
  4. In Tacos: Use it as a flavorful taco filling topped with avocado and salsa.
  5. With Crusty Bread: Mop up the delicious broth with a slice of crusty bread.

Tips for the Perfect Vegetarian Black-Eyed Peas

  1. Choose Quality Ingredients: Fresh vegetables and good-quality vegetable broth enhance the flavor of this dish.
  2. Soaking Dried Black-Eyed Peas: While soaking isn’t strictly necessary, it reduces cooking time and improves the texture of the peas.
  3. Don’t Skip the Spices: Smoked paprika and cumin add depth and smokiness that elevate the dish.
  4. Customize the Vegetables: Feel free to add other vegetables like zucchini, spinach, or mushrooms to make it your own.
  5. For a Creamier Texture: Use a wooden spoon to mash some of the peas against the side of the pot.

Storage and Reheating

  • Refrigeration: Store leftovers in an airtight container in the fridge for up to 4 days.
  • Freezing: Black-eyed peas freeze well. Let the dish cool completely, then transfer to freezer-safe containers for up to 3 months.
  • Reheating: Reheat in a saucepan over medium heat, adding a splash of water or broth if needed to loosen the consistency.

Nutritional Benefits of Black-Eyed Peas

Black-eyed peas are a powerhouse of nutrients. They’re high in protein, making them an excellent meat substitute for vegetarians. They’re also rich in fiber, which aids digestion and keeps you feeling full longer. Additionally, they provide essential vitamins and minerals like folate, iron, potassium, and magnesium.


Conclusion

This vegetarian black-eyed peas recipe is a comforting, nutritious, and flavorful dish that’s perfect for any occasion. It’s easy to make, budget-friendly, and packed with wholesome ingredients. Whether you’re serving it as a main course or a side dish, this recipe is sure to be a crowd-pleaser.

Why not give it a try and see for yourself how satisfying and delicious black-eyed peas can be? Share your experience and let us know how you enjoyed this versatile dish!

Whipped Cream Recipe: A Fluffy, Creamy Delight

Whipped cream is one of the simplest yet most versatile kitchen creations. This light, airy topping transforms desserts, drinks, and even breakfast dishes into indulgent treats. Whether dolloped on a slice of pie, piped onto cupcakes, or stirred into hot cocoa, whipped cream adds a touch of elegance and decadence to almost any dish.

Making whipped cream at home is easier than you might think, and the results are far superior to store-bought versions. With just three ingredients and a few minutes of effort, you’ll have a luscious whipped cream that’s fresher, fluffier, and customizable to your taste.


Why Make Whipped Cream at Home?

  • Freshness: Store-bought whipped toppings often contain preservatives, stabilizers, and artificial flavors. Homemade whipped cream is fresh and pure.
  • Customizable: You can adjust the sweetness, flavor, and texture to suit your needs.
  • Simple Ingredients: It only requires heavy cream, sugar, and a dash of vanilla extract—ingredients you probably already have at home.

Ingredients for Whipped Cream

  • 1 cup heavy whipping cream (cold)
  • 2 tablespoons powdered sugar (or granulated sugar)
  • 1 teaspoon pure vanilla extract

Tools You’ll Need

  • Mixing bowl (preferably chilled)
  • Hand mixer, stand mixer, or whisk
  • Measuring spoons and cups

Step-by-Step Guide to Making Whipped Cream

Step 1: Chill the Tools

  1. Place your mixing bowl and beaters (or whisk) in the freezer for about 15-20 minutes.
  2. Cold tools help the cream whip faster and achieve a more stable consistency.

Step 2: Measure Ingredients

  1. Pour 1 cup of cold heavy whipping cream into the chilled bowl.
  2. Add 2 tablespoons of powdered sugar and 1 teaspoon of vanilla extract.
  3. You can adjust the sugar and vanilla to taste—add more for sweeter cream or reduce for a subtler flavor.

Step 3: Start Whipping

  1. Using a hand mixer, stand mixer, or whisk, begin whipping the cream on low speed. This helps to mix the ingredients without splattering.
  2. Gradually increase the speed to medium-high.

Step 4: Watch for Peaks

  1. As the cream whips, it will start to thicken and form peaks.
    • Soft Peaks: The cream is slightly thickened and forms peaks that flop over. Ideal for folding into desserts or topping pancakes.
    • Medium Peaks: The cream holds its shape but still has a slight curve at the tip. Perfect for most desserts and drinks.
    • Stiff Peaks: The cream stands tall and firm. Great for piping decorations or holding up in layered desserts.
  2. Be careful not to overwhip—if the cream turns grainy or starts to separate, you’ve gone too far. Stop as soon as you reach the desired consistency.

Variations and Flavors

Whipped cream is incredibly versatile, and you can infuse it with different flavors to complement your dishes. Here are some ideas:

  1. Chocolate Whipped Cream: Add 2 tablespoons of cocoa powder along with the sugar for a rich, chocolatey twist.
  2. Citrus Zest: Fold in a teaspoon of orange or lemon zest for a fresh, tangy flavor.
  3. Coffee-Infused: Add a teaspoon of instant coffee or espresso powder for a mocha-like topping.
  4. Spiced Cream: Mix in a pinch of cinnamon, nutmeg, or cardamom for a warm, aromatic touch.
  5. Boozy Cream: Stir in a tablespoon of liqueur, such as Baileys, Amaretto, or Grand Marnier, for a grown-up treat.

Tips for Perfect Whipped Cream

  1. Use Cold Cream: Always start with cold heavy cream for the best results. Warm cream won’t whip properly.
  2. Avoid Overwhipping: Stop as soon as the cream reaches the desired peak stage to prevent it from turning into butter.
  3. Stabilize for Longevity: If you need whipped cream to hold up for longer (e.g., on cakes or pies), add 1 tablespoon of cornstarch or powdered gelatin dissolved in water during whipping.
  4. Use a Large Bowl: Cream doubles in volume as it whips, so make sure your bowl is large enough to accommodate the expansion.
  5. Sweeten to Taste: Adjust the sugar based on how sweet your dessert is. Some recipes may only need lightly sweetened cream.

How to Use Whipped Cream

Homemade whipped cream can be used in countless ways. Here are a few ideas to get you started:

  1. Desserts: Top pies, cakes, brownies, or cheesecakes with a dollop of whipped cream.
  2. Drinks: Spoon onto hot cocoa, coffee, or milkshakes for an extra indulgence.
  3. Breakfast: Add to pancakes, waffles, or crepes along with fresh fruit and syrup.
  4. Fruits: Serve as a dip for strawberries, peaches, or other fresh fruits.
  5. Layered Desserts: Use in trifles, parfaits, or as a filling for cream puffs and eclairs.

Storage and Reheating

  • Refrigeration: Store leftover whipped cream in an airtight container in the fridge for up to 2 days.
  • Rewhipping: If the cream deflates slightly, rewhip it for a few seconds to restore its texture.
  • Freezing Option: Whipped cream can be piped into dollops on a baking sheet and frozen. Once solid, transfer to a freezer bag for use later. Thaw in the fridge before serving.

Why Homemade Whipped Cream Stands Out

Homemade whipped cream is a game-changer in terms of taste, texture, and versatility. It’s free of artificial ingredients, incredibly fresh, and endlessly adaptable. Once you try making it yourself, you’ll never go back to store-bought options.


Conclusion

Whipped cream is a kitchen staple that can elevate almost any dish. Whether you’re baking a decadent cake, preparing a warm cup of hot cocoa, or serving fresh fruit, whipped cream adds the perfect finishing touch.

With just three ingredients and a little know-how, you can whip up a batch of this fluffy, creamy delight in no time. Customize it to suit your taste, experiment with flavors, and enjoy the satisfaction of making it from scratch. Once you’ve mastered this simple recipe, you’ll find endless ways to incorporate homemade whipped cream into your culinary creations.

What’s your favorite way to use whipped cream? Let us know in the comments and share your creations with friends and family!

Crab Rangoon is a beloved appetizer known for its crispy wonton exterior and creamy, savory filling. Originating from American-Chinese cuisine, these deep-fried delights are often found on the menus of Chinese restaurants, but you can easily make them at home. With a perfect balance of textures and flavors, they’re ideal for parties, family gatherings, or just a special snack night.

In this detailed guide, you’ll learn how to make Crab Rangoon step by step, along with tips, tricks, and variations to suit your taste.

GET CRAB RANGOON 35 PIECES IN WALMART 

Why You’ll Love This Recipe

  • Deliciously Irresistible: Creamy crab filling with a crispy shell—what’s not to love?
  • Easy to Make: Simple ingredients and straightforward steps make this recipe beginner-friendly.
  • Customizable: Adjust the filling to your liking or experiment with different dipping sauces.
  • Perfect for Any Occasion: Great as an appetizer, snack, or party food.

Ingredients

For the filling:

  • 8 oz cream cheese, softened
  • 1 cup cooked crab meat (or imitation crab, finely chopped)
  • 2 green onions, finely chopped
  • 1 teaspoon soy sauce
  • 1 teaspoon Worcestershire sauce
  • ½ teaspoon garlic powder
  • ½ teaspoon sugar (optional, for a touch of sweetness)

For the wrappers:

  • 20-24 wonton wrappers
  • 1 small bowl of water (for sealing the edges)

For frying:

  • Vegetable oil (for deep frying)

Optional for serving:

  • Sweet and sour sauce, soy sauce, or chili garlic sauce

Tools You’ll Need

  • Mixing bowl
  • Spoon or spatula
  • Small brush or your fingers (for sealing the wrappers)
  • Deep frying pan or pot
  • Slotted spoon or tongs
  • Paper towels (for draining)

Step-by-Step Instructions

Step 1: Prepare the Filling

  1. In a mixing bowl, combine the softened cream cheese, crab meat, green onions, soy sauce, Worcestershire sauce, garlic powder, and sugar (if using).
  2. Mix thoroughly until all the ingredients are well combined. The filling should be creamy and evenly distributed.
  3. Taste the mixture and adjust the seasonings if needed.

Step 2: Assemble the Crab Rangoon

  1. Lay a wonton wrapper flat on a clean surface.
  2. Place about 1 teaspoon of the crab filling in the center of the wrapper. Be careful not to overfill, as it can make sealing and frying difficult.
  3. Dip your finger or a small brush into the water and lightly wet the edges of the wrapper. This will help seal the Rangoon.
  4. Fold the wrapper into a triangle by bringing one corner to the opposite corner. Press the edges firmly to seal.
  5. For a decorative finish, bring the two side corners up to the top and pinch them together.
  6. Repeat with the remaining wrappers and filling until all are assembled.

Step 3: Fry the Crab Rangoon

  1. Heat about 2-3 inches of vegetable oil in a deep frying pan or pot over medium heat. The oil should reach 350°F (175°C).
  2. Carefully add a few Crab Rangoons to the hot oil, ensuring not to overcrowd the pan.
  3. Fry for 2-3 minutes, turning occasionally, until the wontons are golden brown and crispy.
  4. Use a slotted spoon or tongs to remove the Crab Rangoons from the oil and transfer them to a plate lined with paper towels to drain excess oil.
  5. Repeat with the remaining Rangoons.

Step 4: Serve and Enjoy

  1. Arrange the Crab Rangoon on a serving platter.
  2. Serve warm with your favorite dipping sauce, such as sweet and sour sauce, soy sauce, or chili garlic sauce.

Tips for Perfect Crab Rangoon

  1. Use Fresh Ingredients: Fresh crab meat enhances the flavor. If using imitation crab, chop it finely for a smoother texture.
  2. Seal Properly: Make sure the edges are sealed tightly to prevent the filling from leaking during frying.
  3. Test the Oil: To check if the oil is ready, drop a small piece of wonton wrapper into the oil—it should sizzle and turn golden within seconds.
  4. Don’t Overcrowd: Fry in small batches to maintain consistent oil temperature and ensure even cooking.
  5. Baking Option: For a lighter version, bake the Crab Rangoon at 375°F (190°C) for 12-15 minutes, or until golden brown. Spray with cooking oil for extra crispiness.

Variations

  1. Spicy Kick: Add a pinch of cayenne pepper or a dash of hot sauce to the filling.
  2. Cheesy Twist: Mix in shredded mozzarella or Parmesan for a cheesy filling.
  3. Seafood Medley: Combine crab with shrimp or lobster for a more luxurious treat.
  4. Vegetarian Option: Replace the crab with finely chopped mushrooms, spinach, or mashed chickpeas.
  5. Air-Fryer Method: Cook the Crab Rangoon in an air fryer at 375°F (190°C) for 7-10 minutes for a healthier alternative.

Serving Suggestions

  • Party Platter: Serve alongside egg rolls, spring rolls, or dumplings for an appetizer spread.
  • Themed Dinner: Pair with fried rice or stir-fried noodles for a complete meal.
  • Solo Snack: Enjoy with a good movie or as an indulgent treat.
CRAB RANGOON 35 PIECES IN WALMART 

Storage and Reheating

  • Refrigeration: Store leftover Crab Rangoon in an airtight container in the fridge for up to 3 days.
  • Freezing: Arrange uncooked Rangoons on a baking sheet, freeze until solid, then transfer to a freezer-safe bag. Cook from frozen when needed.
  • Reheating: Reheat in an air fryer or oven to restore crispiness. Avoid microwaving, as it can make them soggy.

Why Homemade Crab Rangoon is Worth It

Making Crab Rangoon at home allows you to control the ingredients and customize the flavors to your liking. The process is simple, and the result is far superior to store-bought versions. Plus, it’s a fun cooking project that delivers a restaurant-quality dish right from your kitchen.


Conclusion

Crab Rangoon is a timeless appetizer that never fails to impress. With its creamy filling and crispy exterior, it’s a treat that’s perfect for any occasion. Follow this step-by-step guide to create your own batch of delicious homemade Crab Rangoon and savor the satisfaction of making this crowd-pleasing dish from scratch.

What’s your favorite dipping sauce to pair with Crab Rangoon? Let us know in the comments and share your creations with friends and family!

Muddy Buddy Recipe: The Ultimate Sweet and Crunchy Treat

Muddy Buddies, also known as Puppy Chow, are a nostalgic and crowd-pleasing treat that combines the satisfying crunch of cereal with the rich sweetness of chocolate, peanut butter, and powdered sugar. Perfect for parties, holiday gatherings, or simply indulging at home, this no-bake snack is easy to make and highly customizable. In this guide, we’ll show you how to make the best Muddy Buddy recipe step by step.


Why You’ll Love This Recipe

  1. Quick and Easy: Ready in under 15 minutes, with no baking required.
  2. Customizable: Swap ingredients to suit your taste or dietary preferences.
  3. Crowd-Pleaser: Loved by kids and adults alike, this treat is always a hit.
  4. Portable: Perfect for packing into bags or jars as gifts or on-the-go snacks.

Ingredients

To make a batch of classic Muddy Buddies, you’ll need the following ingredients:

  • 9 cups rice or corn cereal squares (such as Chex)
  • 1 cup semi-sweet chocolate chips
  • ½ cup creamy peanut butter
  • ¼ cup unsalted butter
  • 1 teaspoon vanilla extract
  • 1 ½ cups powdered sugar

Tools You’ll Need

  • Large mixing bowl
  • Microwave-safe bowl
  • Spatula or wooden spoon
  • Large resealable plastic bag or airtight container
  • Measuring cups and spoons

Step-by-Step Instructions

Step 1: Prepare Your Work Area

  1. Set up a clean, spacious work area for easy access to all your ingredients and tools.
  2. Place the cereal in a large mixing bowl and set aside.

Step 2: Melt the Chocolate Mixture

  1. In a microwave-safe bowl, combine the chocolate chips, peanut butter, and butter.
  2. Microwave on high for 30-second intervals, stirring after each interval until the mixture is smooth and fully melted (about 1-1.5 minutes total).
  3. Stir in the vanilla extract for added flavor.

Step 3: Coat the Cereal

  1. Pour the melted chocolate mixture over the cereal in the bowl.
  2. Use a spatula or wooden spoon to gently fold and coat the cereal evenly. Be careful not to crush the cereal pieces.

Step 4: Add the Powdered Sugar

  1. Transfer the coated cereal to a large resealable plastic bag or an airtight container with a lid.
  2. Add the powdered sugar to the bag or container.
  3. Seal tightly and shake vigorously until all the cereal is evenly coated with powdered sugar.

Step 5: Cool and Serve

  1. Spread the Muddy Buddies out on a large baking sheet or parchment paper to cool and set.
  2. Once fully cooled, transfer the mixture to a serving bowl or store in an airtight container.

Tips for Perfect Muddy Buddies

  1. Use Fresh Ingredients: Fresh cereal and high-quality chocolate make a big difference in flavor.
  2. Don’t Overheat the Chocolate: Microwaving in short intervals prevents burning and ensures a smooth texture.
  3. Even Coating: Gently mix the cereal to avoid breaking the pieces while ensuring even coating.
  4. Shake Well: Shake the bag thoroughly to cover every piece with powdered sugar for that classic look and taste.

Variations to Try

  1. Nut-Free Version: Substitute peanut butter with sunflower seed butter or cookie butter.
  2. Chocolate-Free Option: Use white chocolate chips and add colorful sprinkles for a fun twist.
  3. Holiday-Themed: Add festive sprinkles or colored powdered sugar to match the season.
  4. Crunch Boost: Mix in pretzels, mini marshmallows, or nuts for added texture.
  5. Vegan Version: Use dairy-free chocolate chips, vegan butter, and a plant-based cereal.

Serving Suggestions

  • Party Snack: Serve in small bowls or cups for an easy-to-grab treat.
  • Gift Idea: Pack into decorative jars or bags for a thoughtful homemade gift.
  • Dessert Topping: Use as a topping for ice cream or yogurt for an extra crunch.
  • Movie Night: Pair with popcorn for the ultimate sweet-and-salty combo.

Storage

  1. Room Temperature: Store in an airtight container at room temperature for up to a week.
  2. Refrigeration: For a longer shelf life, store in the fridge for up to 2 weeks.
  3. Freezing: Freeze in a sealed container or freezer bag for up to 3 months. Let thaw at room temperature before serving.

Fun Facts About Muddy Buddies

  • The snack is often called “Puppy Chow” because of its resemblance to dog food, but it’s purely for humans!
  • It’s believed to have originated in the Midwest, where it’s a staple at gatherings and holidays.
  • The recipe has inspired countless variations, from Nutella-based versions to s’mores-inspired mixes.

Why This Recipe Stands Out

This Muddy Buddy recipe is the perfect balance of sweet, salty, and crunchy. It’s not just a snack—it’s a nostalgic trip down memory lane for many, evoking feelings of joy and togetherness. Whether you’re making it for a party or just for yourself, this treat never fails to impress.


Conclusion

Muddy Buddies are more than just a simple recipe; they’re a fun, delicious way to bring people together. With minimal effort and maximum flavor, this treat is a win for any occasion. So, grab your ingredients, follow the steps, and enjoy the sweet satisfaction of making (and eating) this timeless snack.

What’s your favorite twist on Muddy Buddies? Let us know in the comments and share the joy with friends and family!

Newer Posts Older Posts Home

SUBSCRIBE & FOLLOW

FJ Recipe

Never Miss A Recipe!

Join thousands of our subscribers and get our best recipes delivered each week!

Advertisment

Popular Posts

Pigs in a Blanket Recipe

Image

Classic Chicken Alfredo Recipe

Image

Creamy Creamed Spinach Recipe

Image

Labels

  • Breakfast
  • Cake
  • Diet
  • Recipe
  • Vegetarian

Designed by OddThemes | Distributed by Blogspot