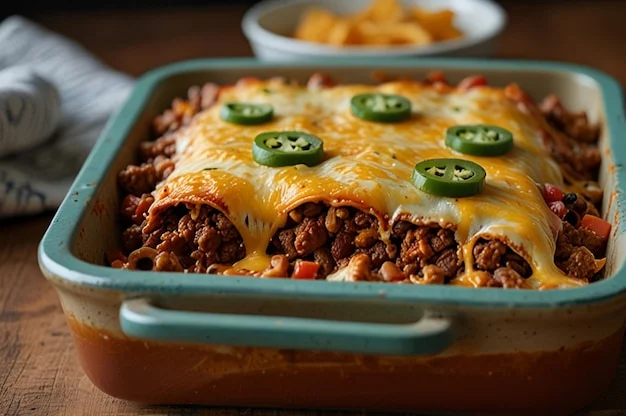
How to Make Beef Enchiladas: A Step-by-Step Guide
Beef enchiladas are a classic Mexican-inspired dish that’s both comforting and flavorful. Soft tortillas filled with seasoned ground beef, smothered in enchilada sauce, and topped with melted cheese make for an irresistible meal. Perfect for a family dinner or a festive gathering, this recipe is simple yet delicious. Follow these step-by-step instructions to create your own beef enchiladas at home.
Ingredients
For the Beef Filling:
- 1 pound ground beef
- 1 small onion, finely diced
- 2 garlic cloves, minced
- 1 teaspoon chili powder
- 1 teaspoon ground cumin
- 1/2 teaspoon smoked paprika
- 1/4 teaspoon salt
- 1/4 teaspoon black pepper
- 1/2 cup canned black beans or pinto beans (optional)
- 1/2 cup corn kernels (optional)
For the Enchiladas:
- 8–10 small flour or corn tortillas
- 2 cups red enchilada sauce (store-bought or homemade)
- 2 cups shredded cheese (cheddar, Monterey Jack, or a Mexican blend)
For Toppings:
- Chopped fresh cilantro
- Sliced green onions
- Diced avocado or guacamole
- Sour cream
- Sliced jalapeños
Step-by-Step Instructions
Step 1: Preheat the Oven
- Preheat your oven to 375°F (190°C).
- Lightly grease a 9x13-inch baking dish to prevent sticking.
Step 2: Prepare the Beef Filling
- Heat a large skillet over medium heat and add the ground beef.
- Cook, breaking it up with a spoon, until browned, about 5–7 minutes.
- Drain any excess fat from the skillet.
- Add the diced onion and minced garlic to the beef. Cook for another 2–3 minutes until softened.
- Stir in the chili powder, cumin, smoked paprika, salt, and black pepper.
- If desired, mix in the black beans and corn for added texture and flavor. Cook for an additional 2 minutes.
Step 3: Prepare the Tortillas
- Warm the tortillas slightly to make them pliable. You can do this by wrapping them in a damp paper towel and microwaving for 20–30 seconds.
- Spread 1/4 cup of enchilada sauce evenly across the bottom of the prepared baking dish.
Step 4: Assemble the Enchiladas
- Lay a tortilla flat and spoon 2–3 tablespoons of the beef filling into the center.
- Sprinkle a small amount of shredded cheese on top of the beef.
- Roll the tortilla tightly around the filling and place it seam-side down in the baking dish.
- Repeat with the remaining tortillas and beef filling.
Step 5: Add Sauce and Cheese
- Pour the remaining enchilada sauce evenly over the rolled tortillas.
- Use a spoon to spread the sauce so that all the enchiladas are fully coated.
- Sprinkle the shredded cheese generously over the top.
Step 6: Bake the Enchiladas
- Cover the dish with aluminum foil and bake in the preheated oven for 20 minutes.
- Remove the foil and bake for an additional 10 minutes, or until the cheese is bubbly and golden.
Step 7: Garnish and Serve
- Remove the enchiladas from the oven and let them cool for 5 minutes.
- Garnish with chopped cilantro, sliced green onions, and your favorite toppings like sour cream, avocado, or jalapeños.
- Serve warm with a side of rice, beans, or a fresh salad.
Tips for Perfect Beef Enchiladas
- Use Fresh Ingredients: Fresh tortillas, high-quality enchilada sauce, and freshly grated cheese make all the difference.
- Customize the Filling: Add roasted vegetables, rice, or even cooked chorizo for a unique twist.
- Make It Ahead: Assemble the enchiladas up to a day in advance and refrigerate. Bake just before serving.
- Freeze for Later: Beef enchiladas freeze well. Store in an airtight container for up to 3 months and reheat in the oven.
Why This Recipe Works
This beef enchilada recipe balances bold flavors with simple techniques, making it accessible for cooks of all skill levels. The seasoned beef, combined with melty cheese and rich enchilada sauce, creates a satisfying dish that’s sure to please everyone at the table.
Give this recipe a try, and enjoy the flavors of a Mexican classic from the comfort of your own kitchen!


0 Comments